This is going to be a fun topic! Before we dive in, version 2.3 launched, silently and without fanfare (I forgot to post an update). It adds a feature that allows you to search the map for landmarks, addresses, and Alert Wildfire cameras. Now on to the main show…
I’d like to show you a technical preview of a new feature that is currently under development for Smoke Point. Read to the end for a link to an interactive demo (note the demo only works on desktop or laptop computers – not smartphones).
I made Smoke Point to gather actionable information about the location of new fires, and engage the public in helping provide that information to firefighters. As a firefighter, it is critical to have confidence in the information you have about the location of a new fire. In some cases, there is little good information available, and locating the fire is difficult.
At the core of Smoke Point is a triangulation algorithm. The triangulation algorithm relies on multiple pictures taken from different locations to estimate the fire location, and is specifically designed to handle data that is known to be inaccurate. Smartphones are pretty inconsistent about knowing what direction they are pointed and a lot of work has gone into measuring just how inaccurate, and under what circumstances. Under the best of circumstances, at two miles away, a modern smartphone is uncertain to the tune of about five football fields. This makes a big difference when deciding where to commit fire resources and what route to use to get there. Even the more accurate Alert Wildfire cameras have some error.
There is a way to bring this uncertainty down to near zero, and that’s using a technique I am calling “terrain mapping”. Not only does this technique correct for error when calculating the direction the phone was pointed when taking a picture through Smoke Point, it actually allows you to calculate the geographic position of every pixel in the image. Now that is cool. Ok, I think it’s cool.
A single picture from a smartphone camera or an Alert Wildfire camera can provide pinpoint accuracy for the location of the fire.
Terrain mapping
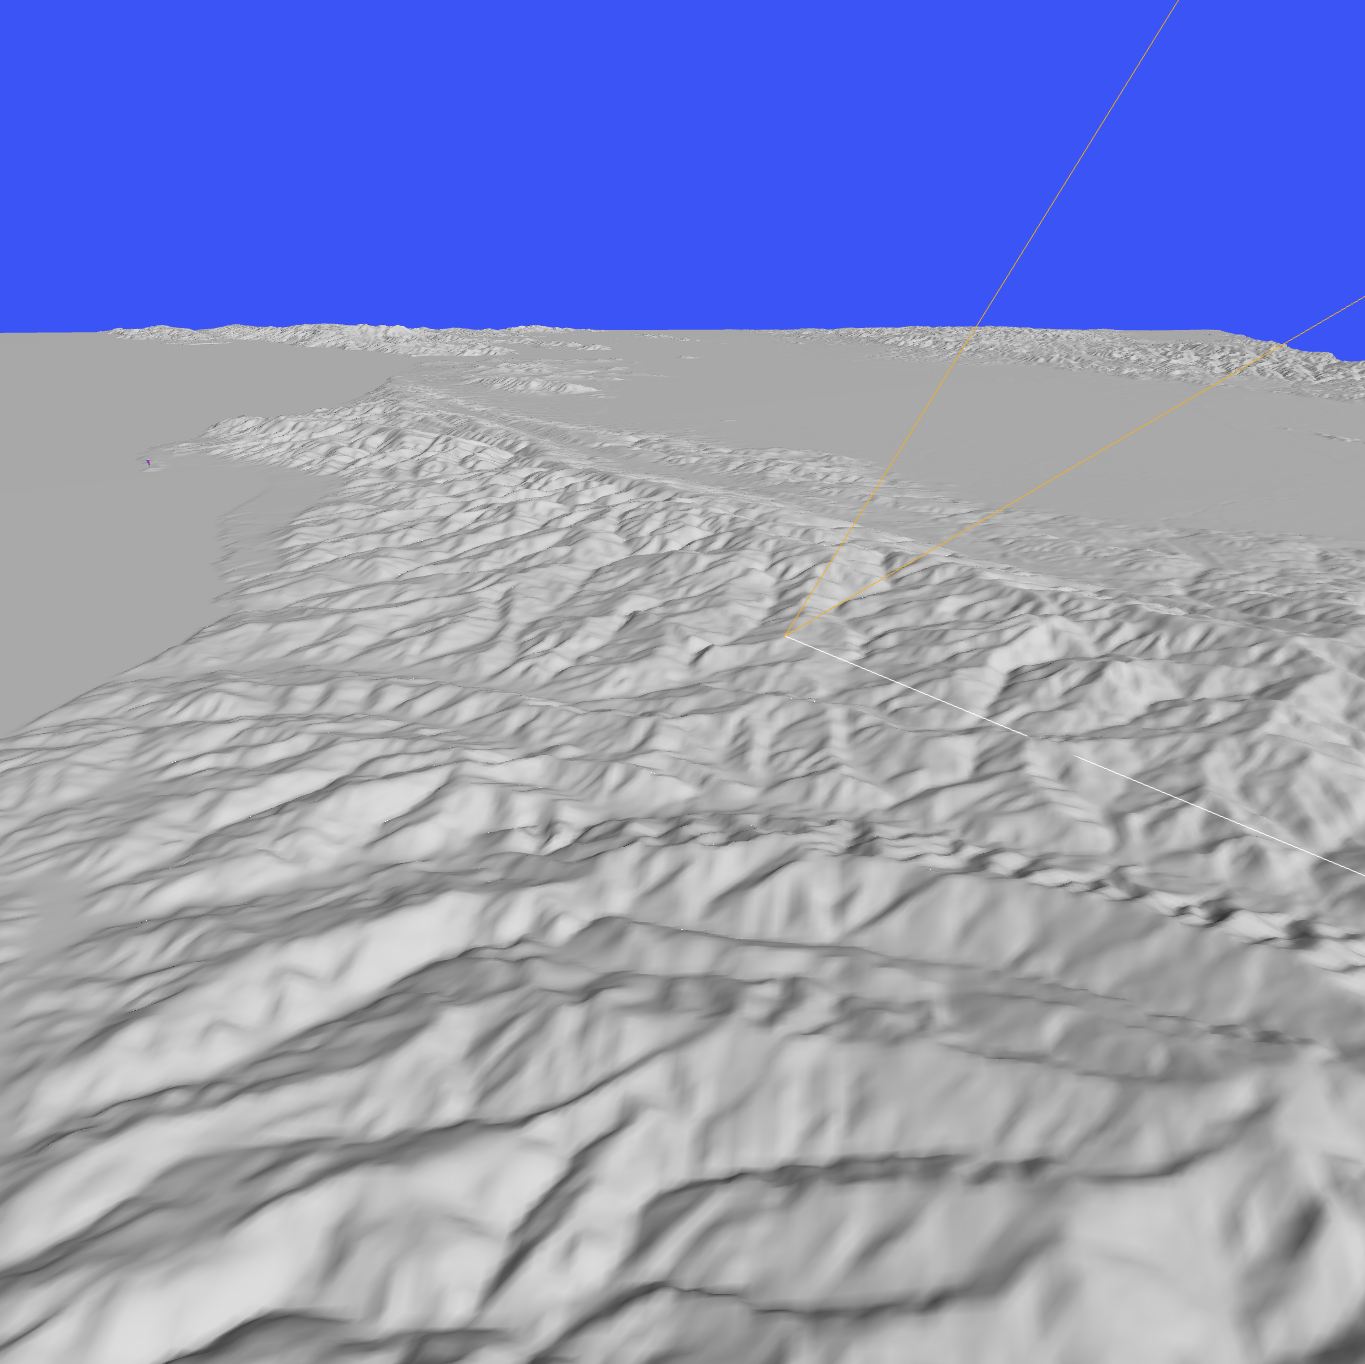
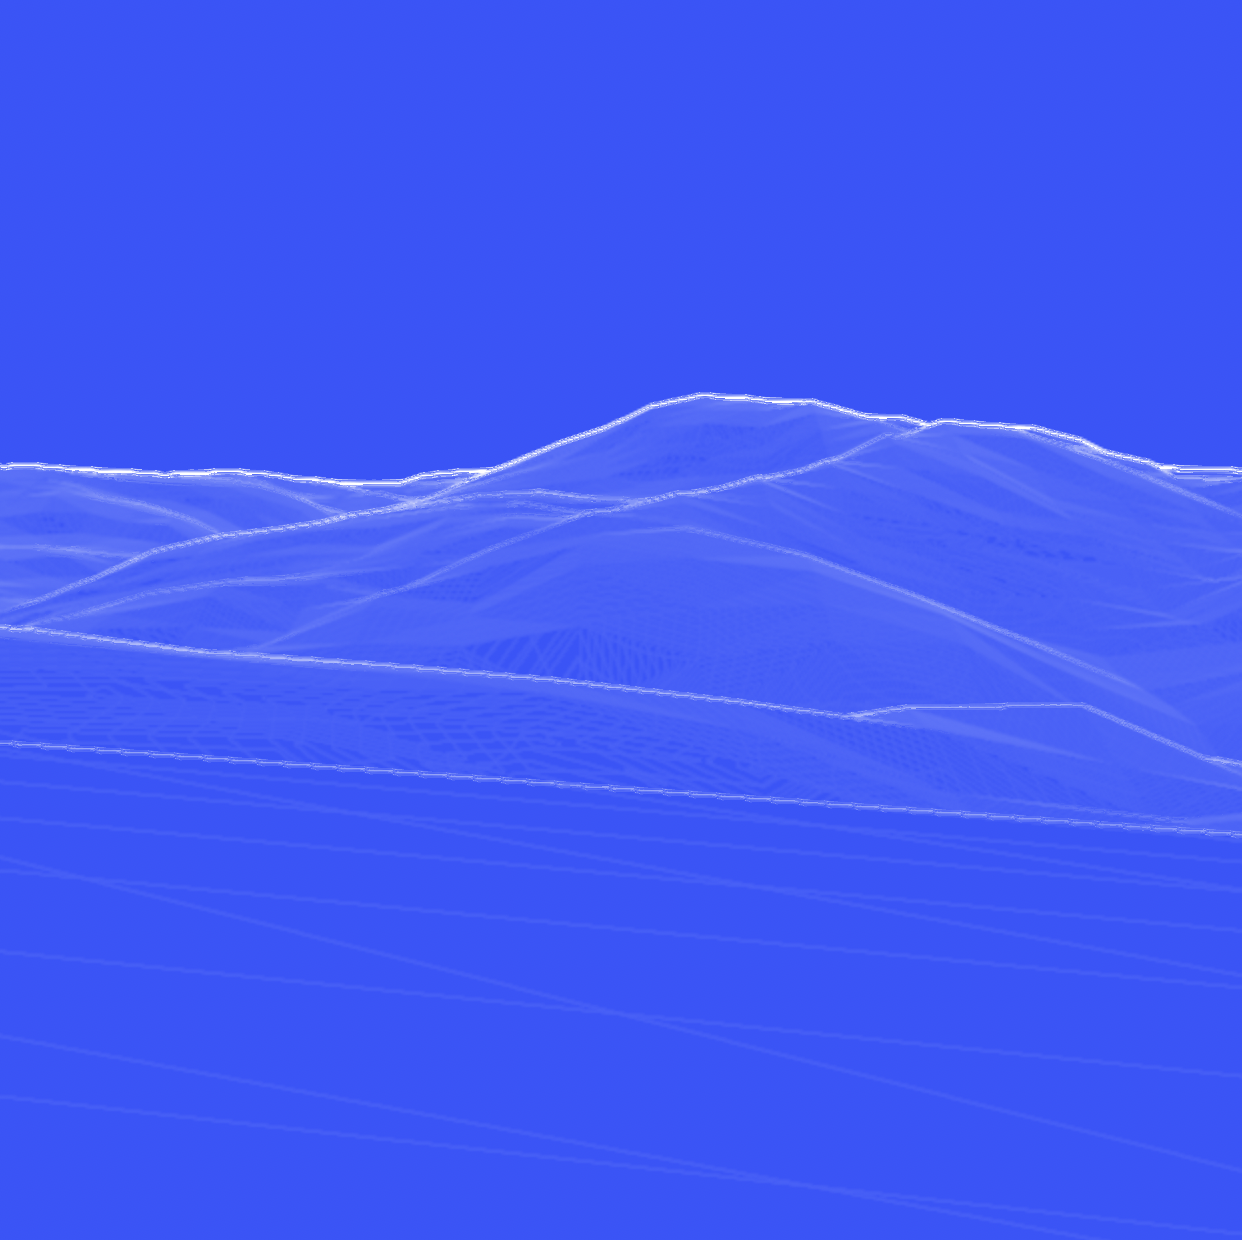
Under the hood, terrain mapping uses the same technology that powers modern video games. This technology specializes in rendering (drawing to the screen) virtual three-dimensional objects and worlds. By combining 3d rendering with Earth elevation data (such as that collected by the satellite mission SRTM) we can build a Digital Elevation Model: a virtual 3d representation of Earth’s topographic surface.
For the purposes of this project, instead of rendering shaded hillsides like in the picture below (on the left), we apply a special rendering process that highlights the ridge lines and hill tops (right), and otherwise draws nothing.
When you take a picture with Smoke Point today, the app captures the latitude and longitude of the camera as well as the approximate direction the camera was pointing. When employing terrain mapping, nearby ridge lines, given the location and direction from the phone’s sensors, are projected onto the picture. Since the phone’s sensors aren’t perfect (remember?), the ridge lines probably won’t line up exactly with those in the picture.
Correcting the phone’s sensor error is accomplished by aligning the virtual ridge lines with the real ones in the picture. Not only is the exact direction the camera was pointed now known: its tilt up, down, and side to side is also known, and so on. With this new information, a process called ray casting can be used to calculate where a virtual ray that is “sent out” from the camera intersects with the Digital Elevation Model. The equivalent Earth geographical position of that intersection point can be calculated. A user picks where to send the virtual ray by selecting a reference location, such as the base of a smoke plume, directly on the picture. In this way, a single picture, combined with terrain mapping, can pinpoint the location of a fire. Remember: triangulation requires multiple pictures from different locations.
Let’s dive into an example.
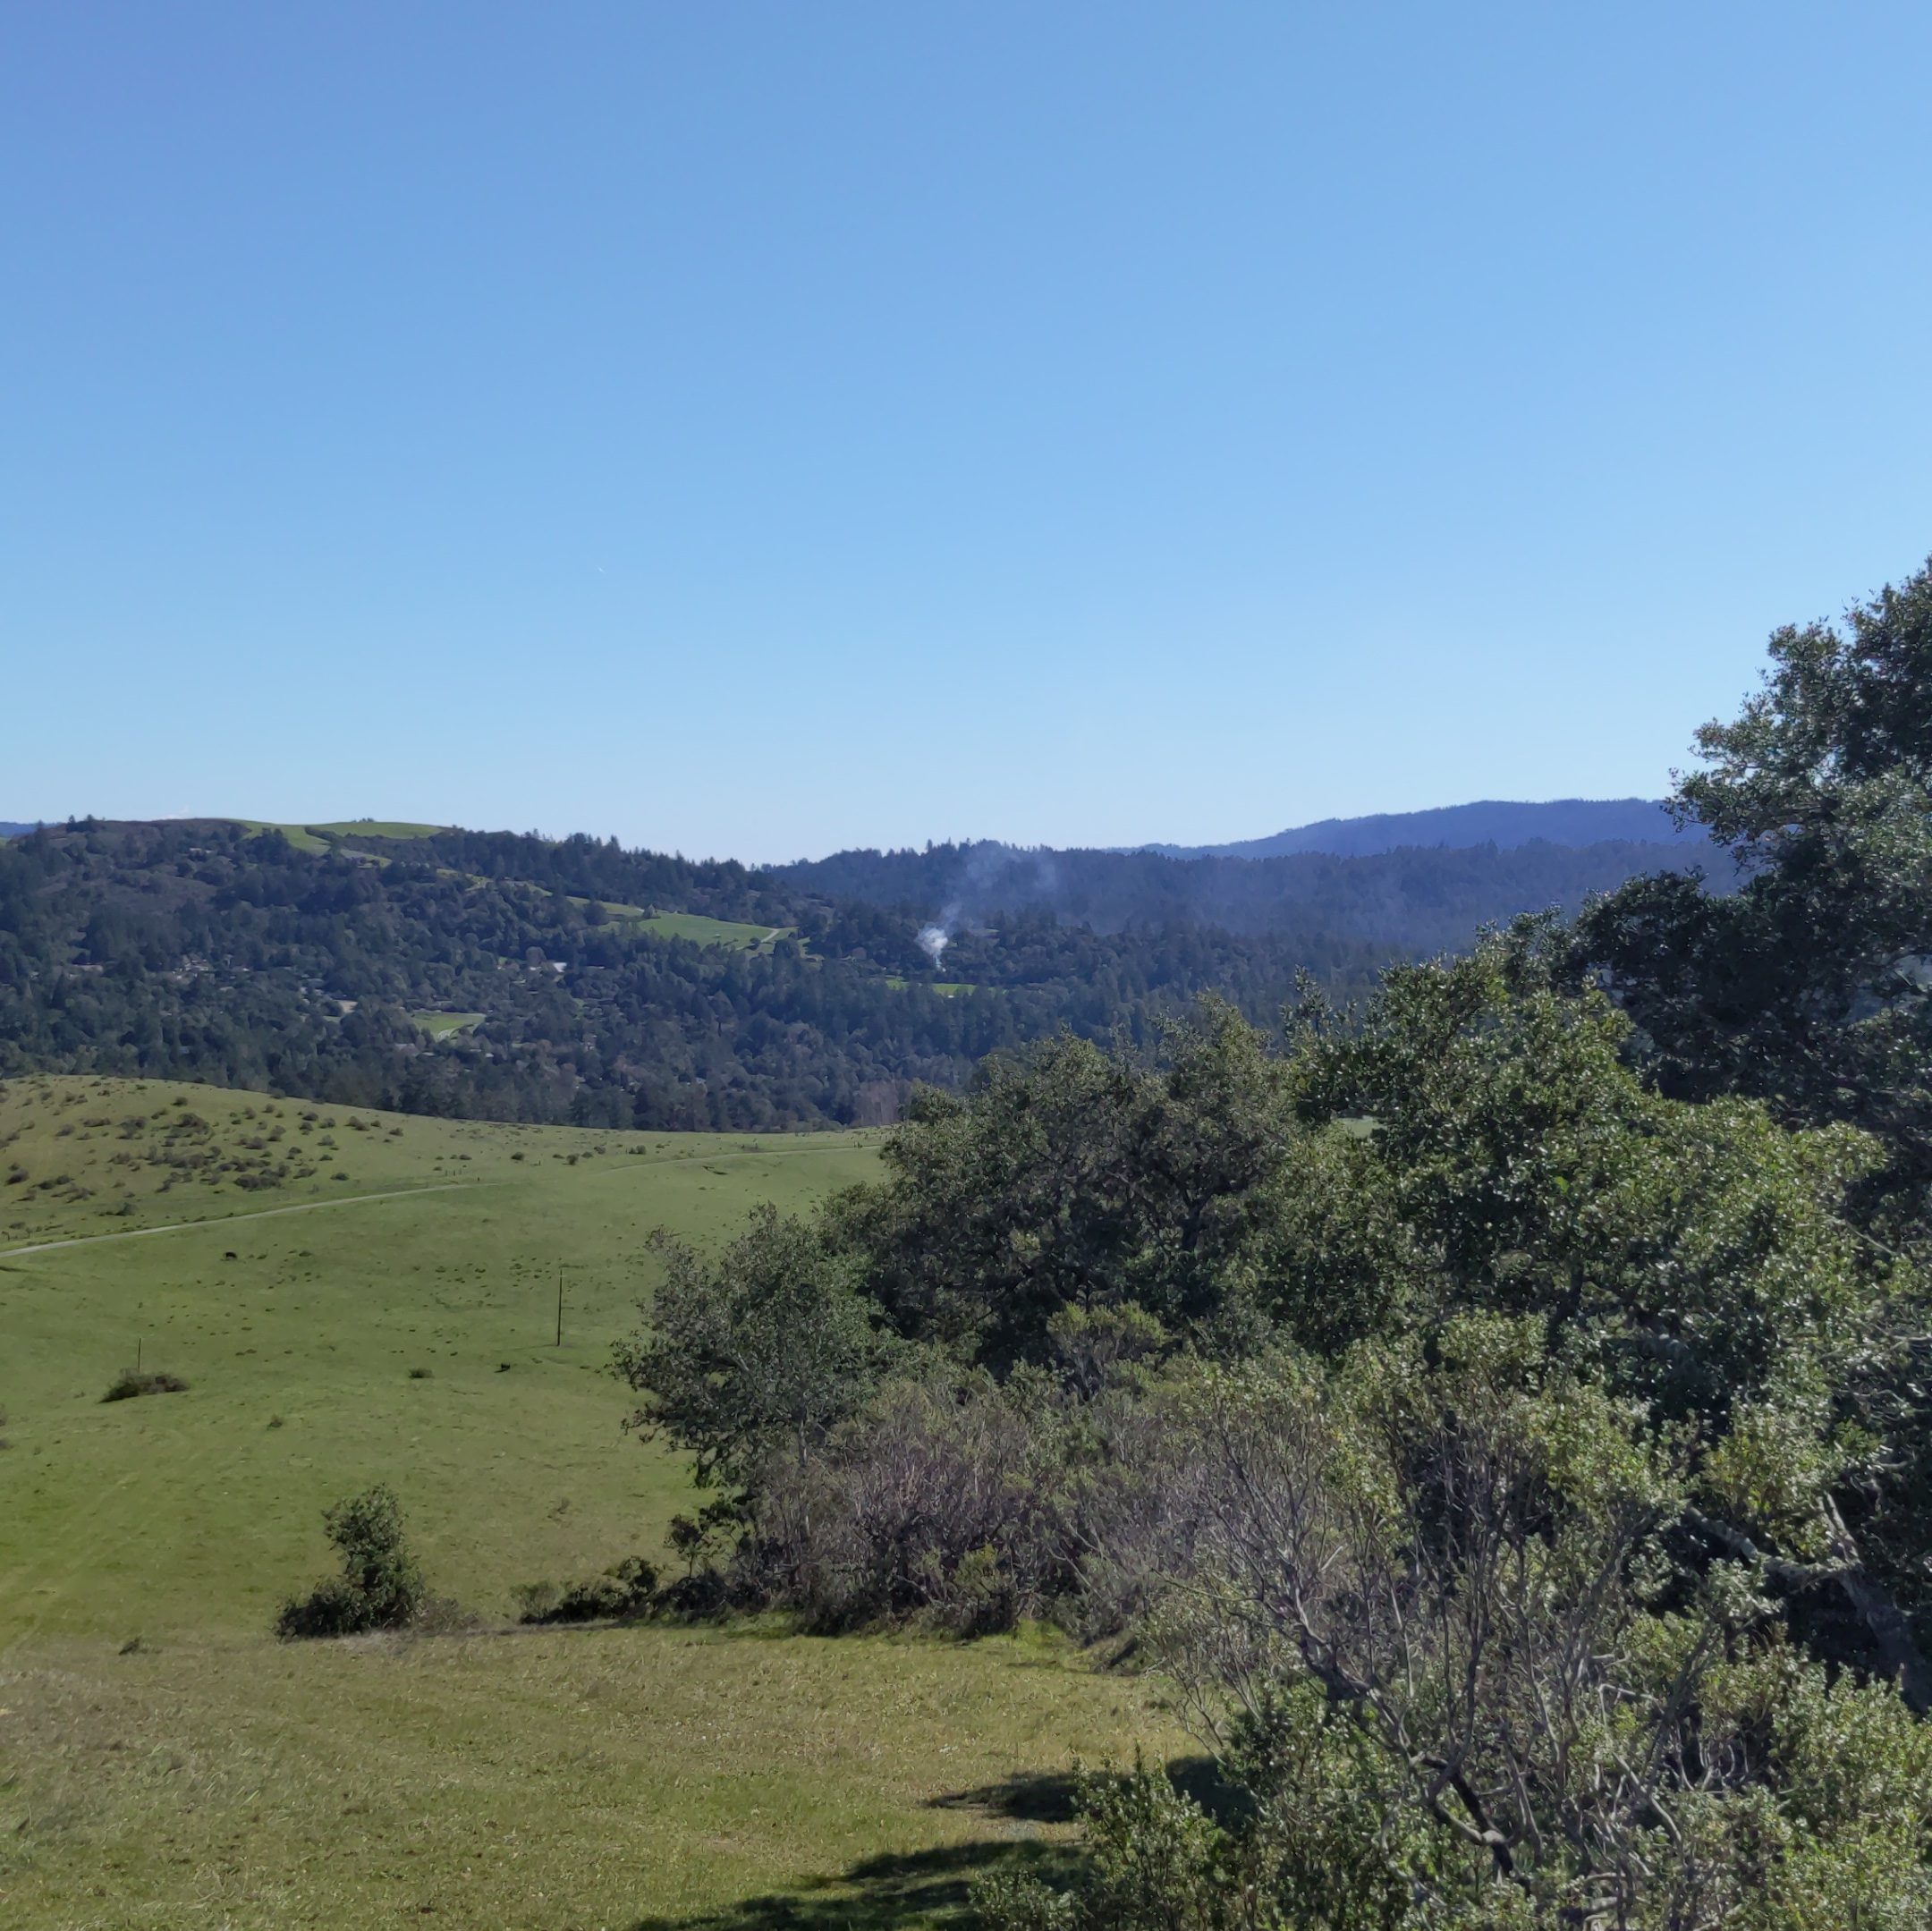
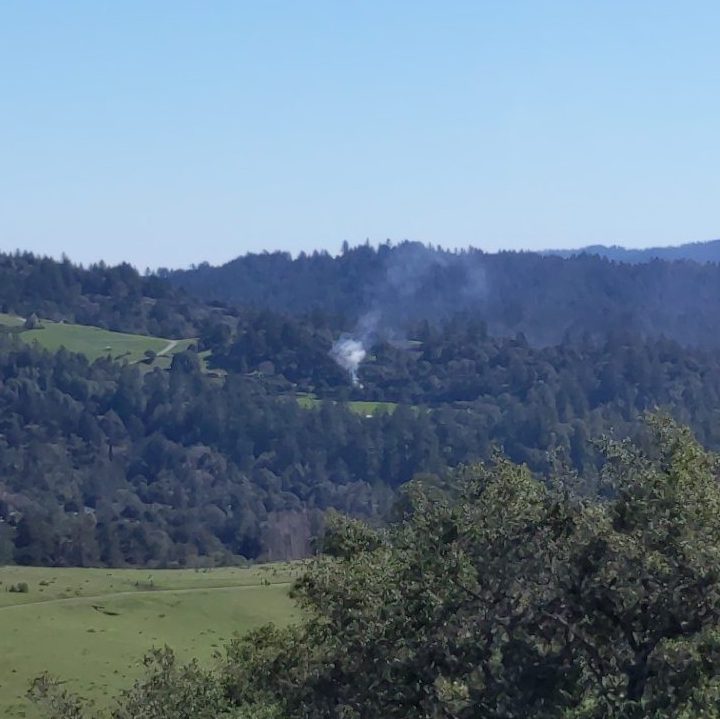
A couple weeks ago we were dispatched to a smoke investigation in La Honda. A park ranger up on a hill across the valley had a clear view and used Smoke Point to capture a picture.
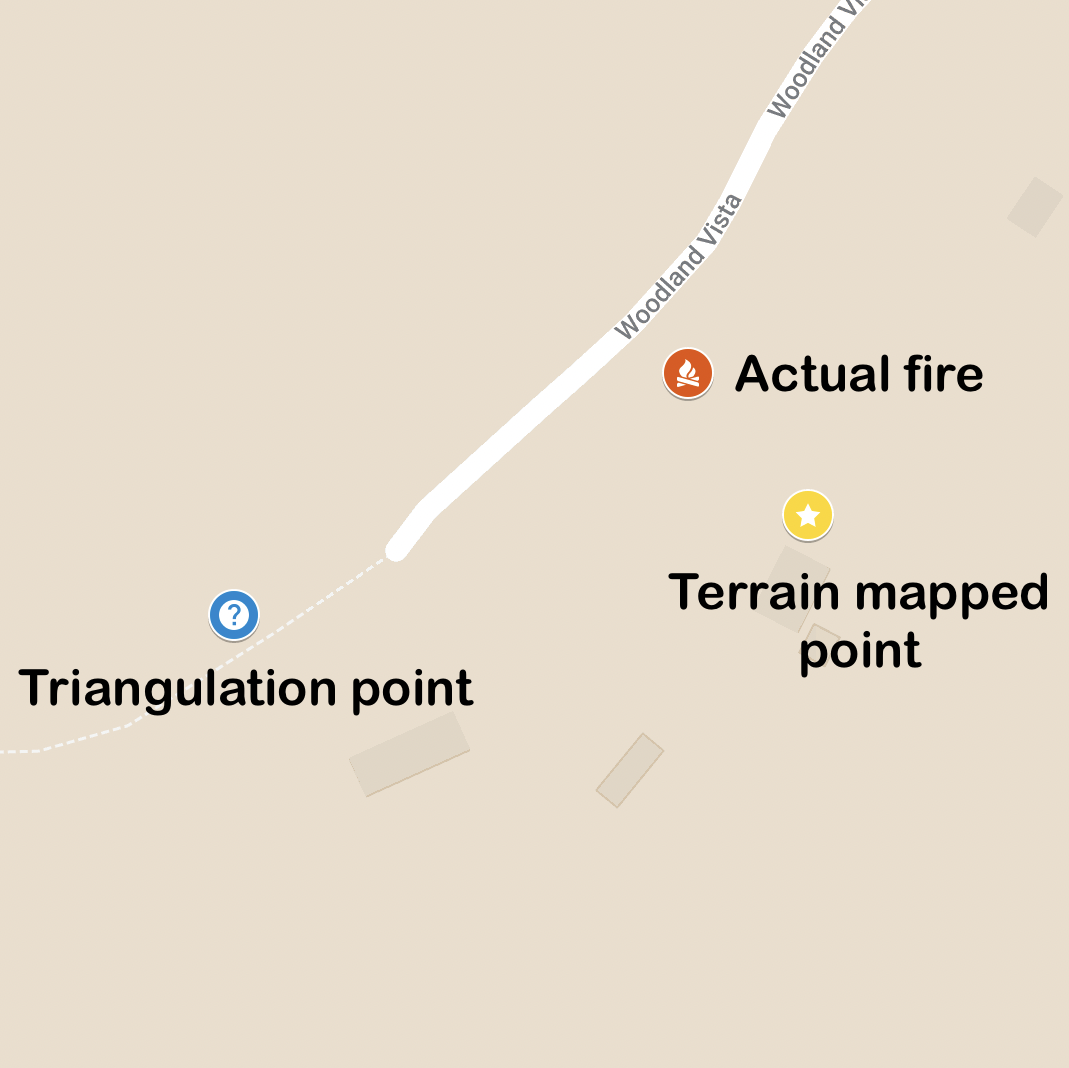
Eventually, two other Smoke Point users captured additional readings resulting in a total of four. Triangulation put the fire somewhere towards the end of Woodland Vista in Cuesta La Honda.
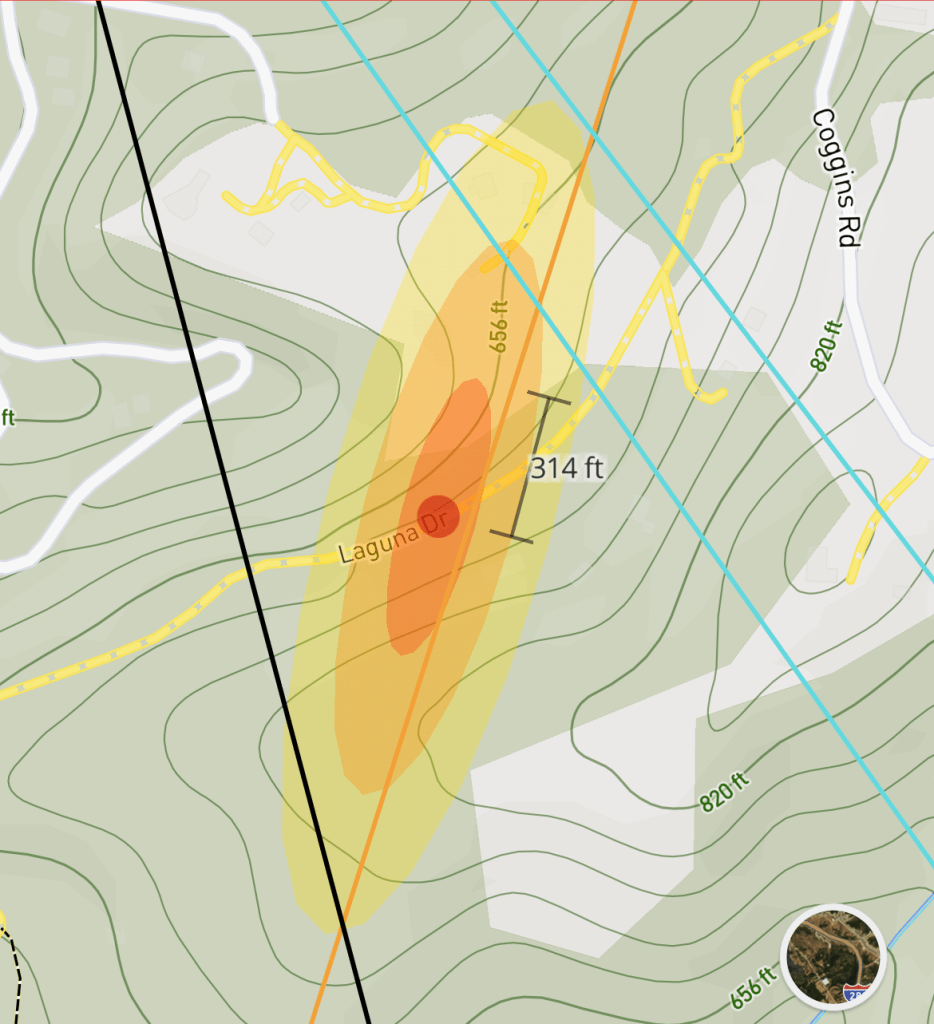
Several fire resources were dispatched to investigate, and the ranger, using their local knowledge and the annotated map with their initial reading in Smoke Point, deduced that access to the fire would most likely be from one of two roads. With additional information conveyed over the radio, firefighters in the area found the source after about 15 or 20 minutes of searching: a prescribed and safe burn pile at a local ranch.
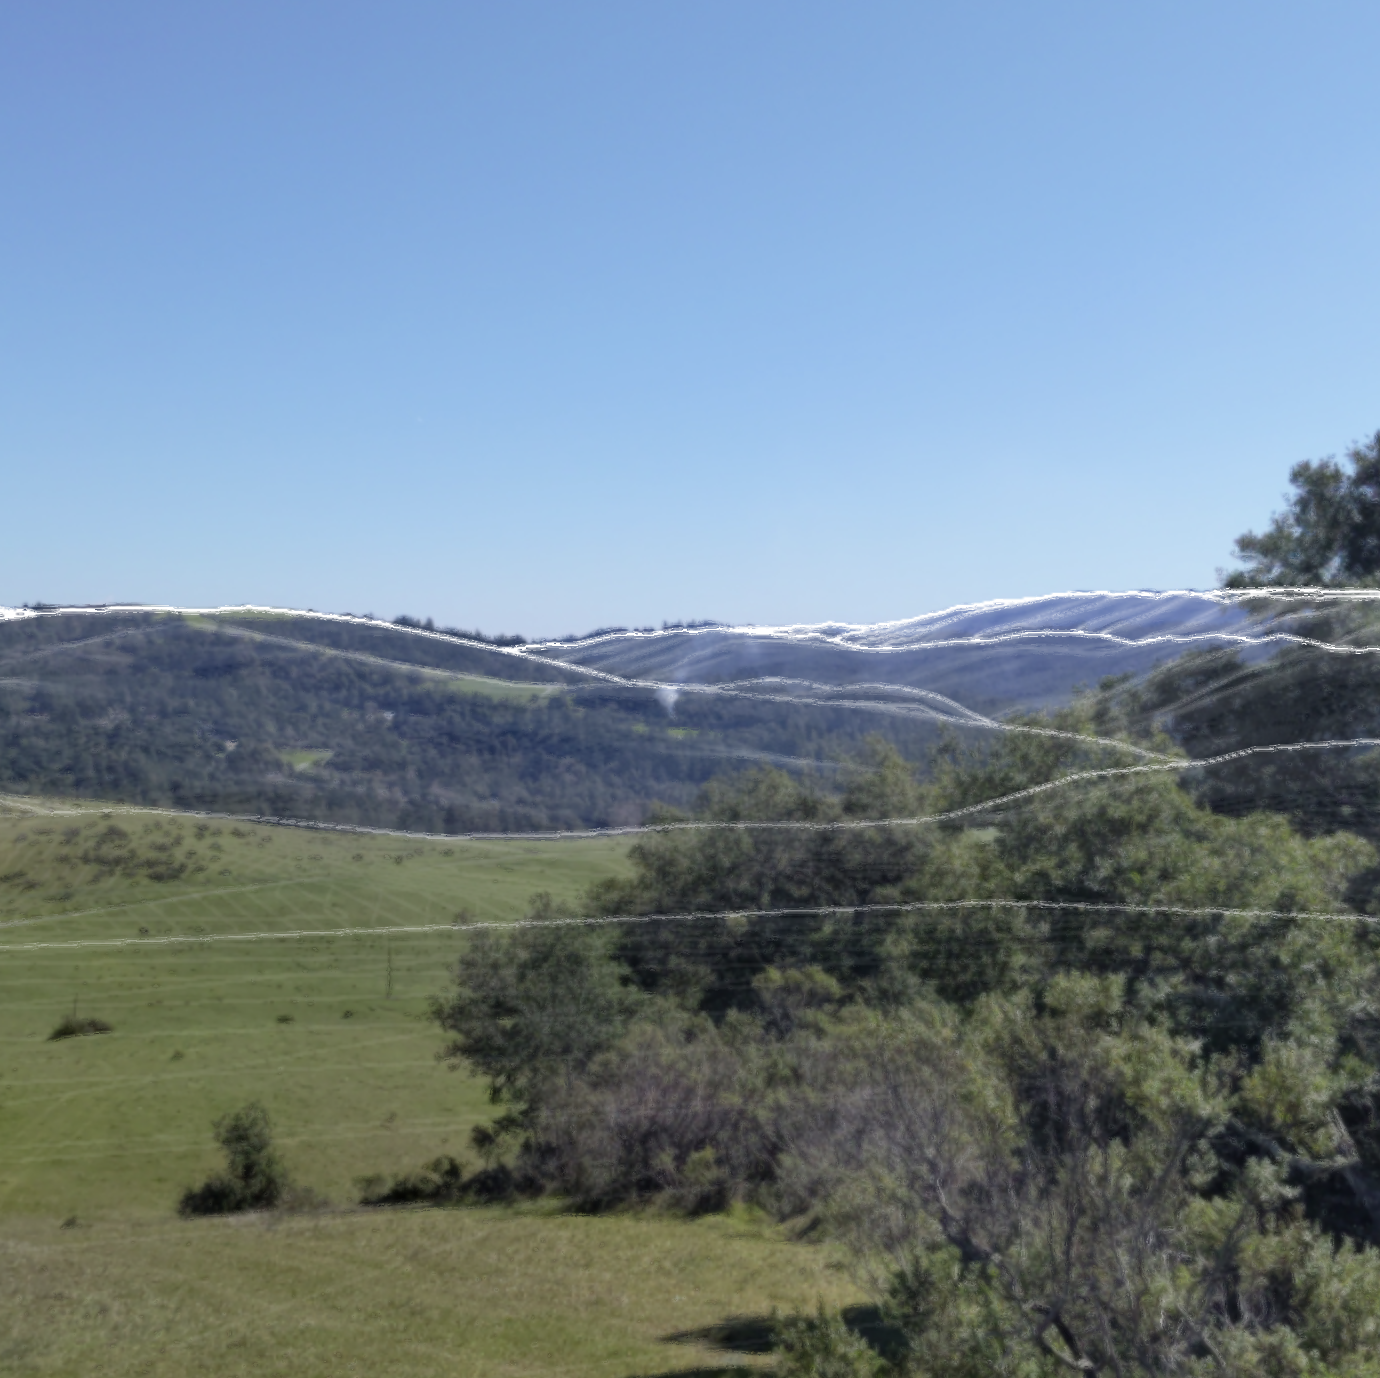
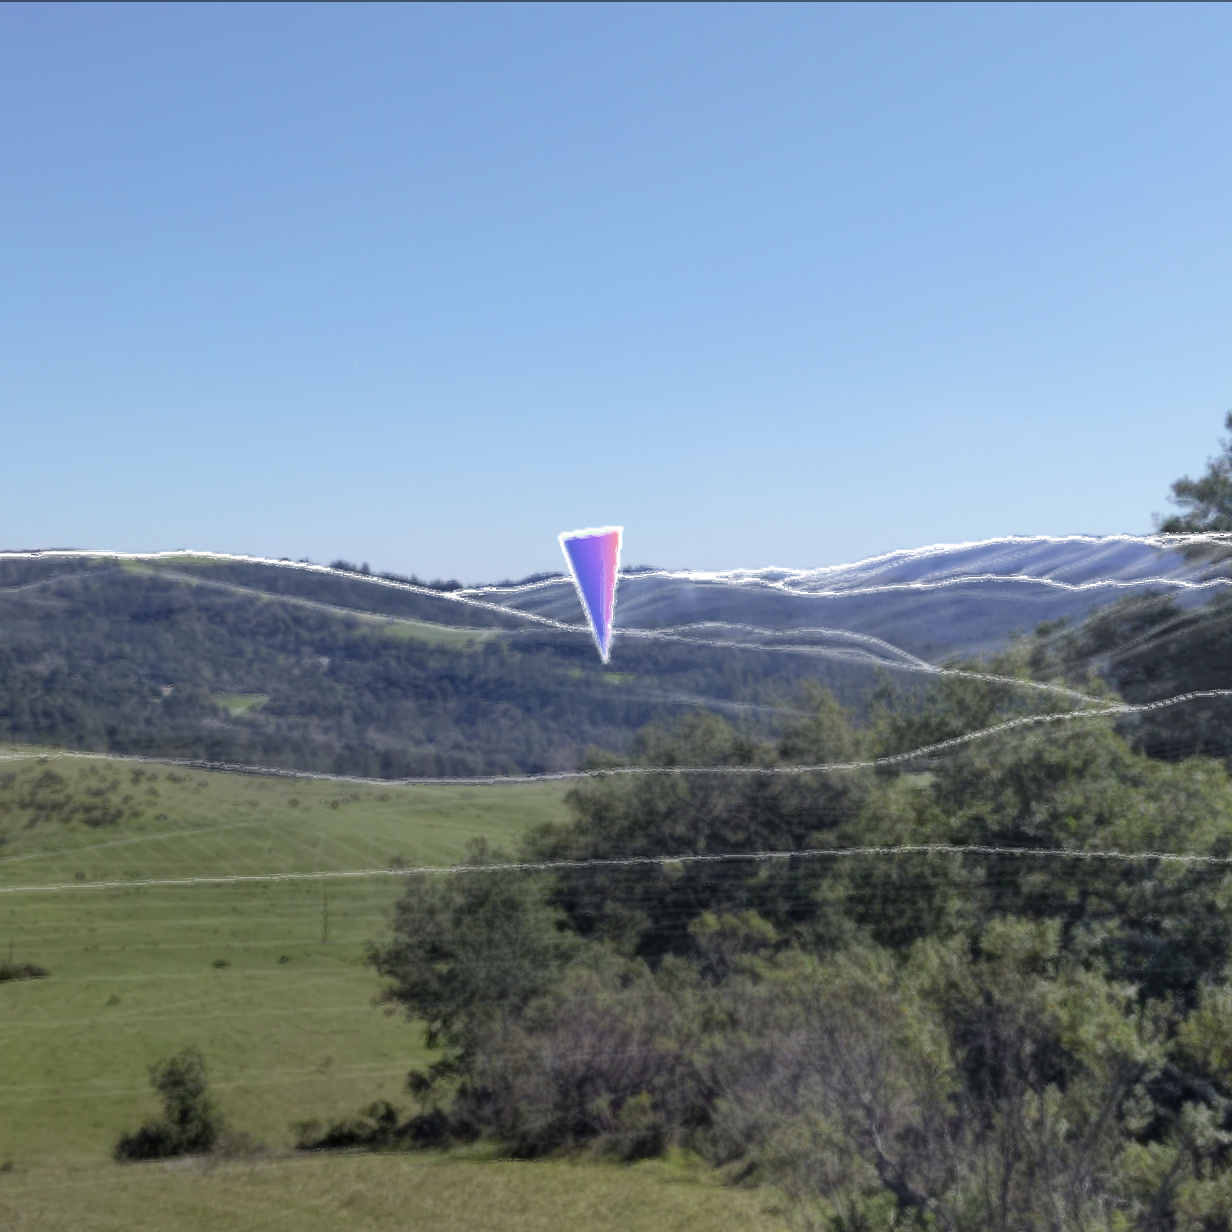
Let’s now apply terrain mapping to the park ranger’s picture (the first picture taken during this incident). Below (left) the picture has ridge lines overlayed in white. Notice how they are not lined up: they are both too low and too far left. This misalignment is due to error introduced by the smartphone’s sensors. On the right, I have simply “dragged” the ridge lines up and right so that they line up with those in the picture.

Let’s now locate the bottom of the smoke column in the image. A click of the mouse on the base of the smoke plume sends that virtual “ray” out into the 3d world and calculates where it intersects the Digital Elevation Model (below, left, shows a “pin” at the location of the fire). The result, after converting to Earth coordinates, is a latitude and longitude of 37.31304, -122.26687, right at the address with the prescribed burn.
A single reading with terrain mapping provided better information than triangulation did with four readings.
A note: I chose this example because the smoke column was more or less fully visible, allowing for selecting the pixel at the base of the column. If the base were obscured, such as behind a hill or mountain, pinpointing like this would not be possible. Instead, terrain mapping would still provide a direction with high accuracy, which could then be used for high accuracy triangulation when combined with another reading.
And that’s a wrap! I hope you enjoyed reading this post. With a technical proof completed, work can start to integrate the feature into the Smoke Point app itself. That is no small feat, and I will send out another post when that work is done.
To play around with the demo and get a hands-on sense of how the system works (remember, desktops and laptops only), head on over to the demo site. In the demo, on the left you’ll see the ridge lines overlayed on the image, and on the right a more traditional 3d representation of the hills. You’ll also notice an object representing the smartphone camera’s field of view, which will move as you correct the alignment of the ridge lines. An explanation of the controls are included. Enjoy!
Lastly, I would like to express my thanks to Jonathan de Ferranti of viewfinderpanoramas.org for providing the excellent digital elevation data that makes it possible to build quality Digital Elevation Models. I would also like to thank my lovely wife for editing this blog post until it actually made sense.
